登入
打造你的網站
How to Edit Your Squarespace Site: Quick-Start Visual Guide
A clear, visual Squarespace Tutorial for beginners. Learn how to edit a Squarespace website quickly and effectively, from content changes to style updates.
In today's digital-first world, more creators, brands, and businesses are building websites to showcase their work, promote products, and grow their online presence. Among the many website platforms, Squarespace stands out for its sleek design templates and powerful, beginner-friendly editing tools. Whether you're launching your very first site or fine-tuning an existing one, knowing how to edit a Squarespace website through this Squarespace Tutorial is an essential skill for keeping your brand fresh and engaging.
This step-by-step visual guide walks you through the entire Squarespace editing process — from updating content and adjusting styles to customizing layouts — all without writing a single line of code. With just a few clicks, you can transform your site into something truly your own.

Step 1: Enter Editing Mode — Quick Tour of the Navigation Panel
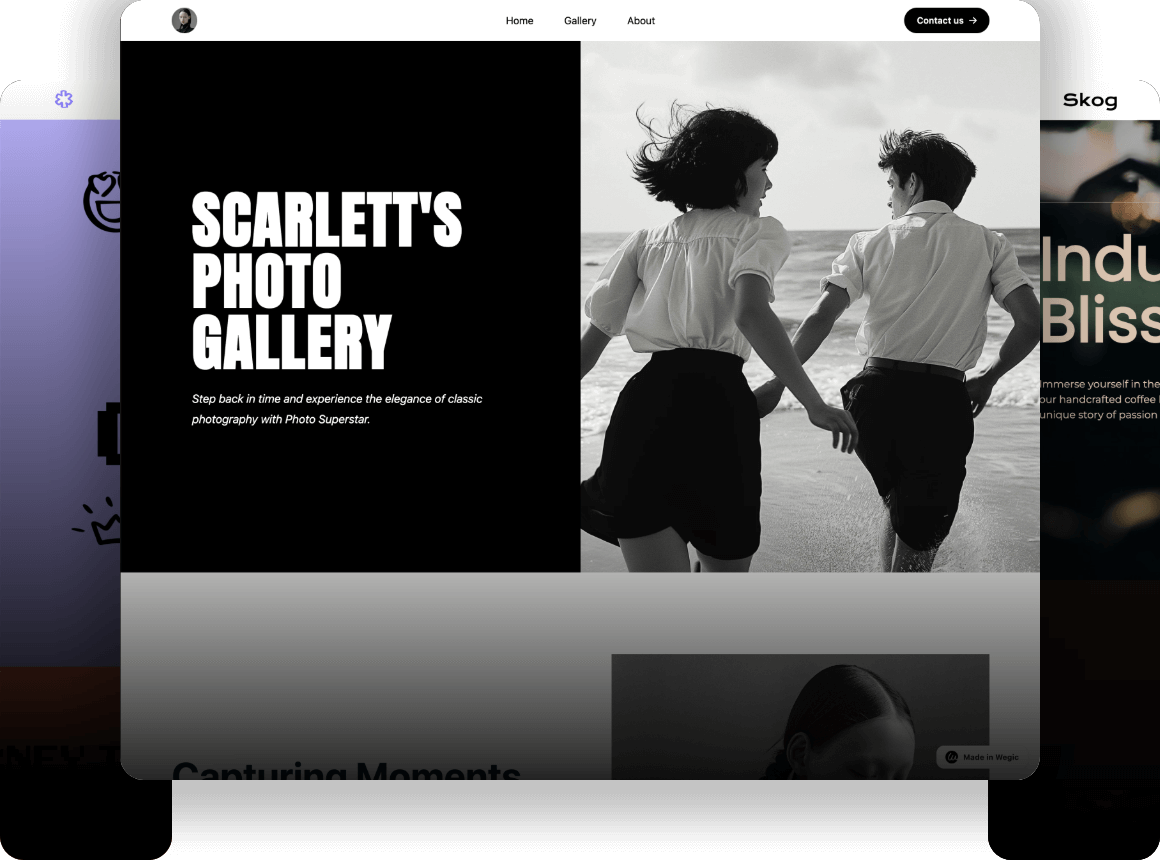
If you're looking to Edit Your Squarespace Website, the first step is to understand the navigation and editor tools. Before you start customizing your Squarespace site, you'll need to access the editor interface. Squarespace follows a "what you see is what you get" approach, meaning any changes you make are instantly visible — no coding required.

How to log in and open your site editor
Go to squarespace.com and click Log In in the top-right corner. Sign in to your account and select the site you want to work on (if you have more than one). Click the site's preview thumbnail to open its dashboard.
On the left-hand side, you'll see a vertical navigation panel with these main sections:
- Website – View and manage your site's page structure.
- Design – Customize templates, fonts, and color schemes.
- Marketing – Set up SEO, promotions, and connect social media.
- Analytics – Track traffic and visitor data.
- Settings – Manage account details, domains, language, region, and basic SEO options.

Starting real-time editing
Once you're on the page you want to update, click the Edit button in the upper-left corner. The page instantly becomes fully editable — you can click any element (text, image, block, button, and more) to move it, change it, or replace it. Learning how to edit a Squarespace website at this stage ensures you can make changes confidently without worrying about breaking your design.
Step 2: Use the Fluid Engine Drag-and-Drop Editor
Squarespace 7.1 introduced a brand-new editing engine — Fluid Engine — which is the biggest difference from previous versions and a major leap in editing flexibility.

What is Fluid Engine?
Fluid Engine is a visual editor based on a grid layout. This Squarespace Tutorial section helps you see how Fluid Engine changes the way you Edit Your Squarespace Website, giving you more control over layout and design. It allows users to drag any module to any position on the page, and finely control the layout by stretching, merging, grouping, and other methods. This system provides non-professional designers with a very high degree of freedom.
Add or upgrade an editing section
Each page is made up of multiple "sections," which are the main structural units of the page.
- Click any "+" button on the page to add a new section.
- Squarespace offers preset content section templates (such as title sections, text-and-image sections, product display sections, etc.),
- Older Squarespace sections (not based on Fluid Engine) can be upgraded to the new structure with one click via a prompt, giving you more control over layout.
Block management and drag control
Each section contains "modules," also called "content blocks," including:
- Text
- Image
- Video
- Button
- Form
- Social Links
- Product Grid, etc.
Fluid Engine allows you to drag any module directly to any position in the grid and customize the width and layout levels by adjusting the number of grid units it occupies. It also supports stacked display between elements, alignment tools to assist with layout, and background color settings. Understanding how to edit a Squarespace website using Fluid Engine allows you to control every detail of your page layout with precision.
Mobile Responsive Adjustments
Step 3: Editing Text, Images, and Buttons
The heart of your website is the message you deliver, so knowing how to Edit Your Squarespace Website by adjusting text and visual elements effectively is essential.
Editing Text
Text blocks are among the most frequently used elements on a webpage. Click on any text block to open a floating toolbar where you can:
- Adjust font size, apply bold or italic styling, and change text color,
- Insert hyperlinks, numbered lists, or bullet points,
- Create block quotes or highlight specific phrases
- Use handy keyboard shortcuts such as Ctrl + B for bold and Ctrl + K to add a link.
You can also assign heading tags (H2, H3, etc.) via paragraph styles. This not only improves visual hierarchy but also strengthens SEO by making your site's structure clearer to search engines.
Uploading and Editing Images
Click on any image block to upload a new image or replace the existing one. Squarespace's built-in image editor allows you to:
- Crop and resize images to fit your layout,
- Apply filters to match your site's visual style,
- Set a focal point so the most important part of the image stays centered across devices,
- Enable click-to-enlarge or link the image to another page.
For best results, use images at least 1200px wide in JPG or PNG format, keeping file sizes under 200KB to ensure fast load times and crisp display on high-resolution screens. A big part of how to edit a Squarespace website is knowing how to work with images, so they load quickly and look sharp on all devices.
Customizing Buttons
Buttons are powerful calls to action that guide visitors toward the next step, whether it's:
- Contacting you,
- Reading more content,
- Visiting a product page,
- Submitting a form.
Click on any button to update its text, set its destination link, choose between primary or secondary styles, and customize colors, rounded corners, and shadow effects to match your brand's design.
Step 4: Customizing Site-Wide Styles and Design Settings
Once your content is in place, it's time to make your site visually cohesive and on-brand. Squarespace's Site Styles panel lets you set design rules that apply across the entire site, so every page looks consistent. As this Squarespace Tutorial shows, site-wide styles unify your design choices and make every page look consistent.

Accessing the Styles Panel
From the left-hand navigation, click Design → Site Styles to open the global styling settings. Here you can adjust:
- Fonts, choose typefaces, pair headings with body text, and set a clear size hierarchy.
- Colors define a consistent palette for backgrounds, text, links, and buttons.
- Spacing, fine-tune line height, paragraph spacing, content width, and page margins.
- Links: decide whether links are underlined and set hover effects.
- Buttons, choose between solid or outline styles, adjust corner radius, and add subtle animations.
All updates show instantly in the live preview, so you can see exactly how your site will look.
Customizing Headers and Footers
Your header (top navigation) and footer are consistent site-wide, making them key areas for branding:
- Header – upload your logo, style the navigation menu, and choose whether it stays fixed at the top,
- Footer – add copyright text, social media icons, and newsletter sign-up forms,
- Apply background colors, transparency levels, and font styles that align with your overall design.
Responsive Style Check
When you're happy with your design, switch to mobile and tablet preview modes to ensure your site looks great on every device. This helps prevent issues like text appearing too small or elements spilling off-screen, giving visitors a seamless experience no matter how they access your site. When you master how to edit a Squarespace website at the style level, your site will have a consistent and professional appearance.
Step 5: Editing on Mobile with the Squarespace App
Squarespace's mobile app (available for both iOS and Android) lets you make quick updates to your site anytime, anywhere—perfect for those moments when you're away from your desk. It's a handy way to Edit Your Squarespace Website while traveling or away from your main computer.
Using the app, you can:
- Preview pages and make basic edits, such as updating text or replacing images,
- Check and manage orders (for e-commerce templates),
- Write, edit, and publish blog posts,
- View your site's analytics,
- Make simple style adjustments, such as changing colors or fonts.
While the mobile app is excellent for light edits and monitoring, advanced tasks—like complex layout changes or detailed block positioning—are best done on the desktop version for full control. The app's flexibility means you can practice how to edit a Squarespace website even when you're away from your desk.
Step 6: Saving and Publishing Your Changes
After editing, whether on desktop or mobile, it's time to save and publish your updates. When you follow this Squarespace Tutorial, publishing becomes the final rewarding step. Squarespace makes this process straightforward:
- In the top-right corner of the editor, click Done.
- Select Save to store your changes, Discard to cancel, or Publish to make them live immediately.
- All published updates take effect instantly—no extra deployment steps required.
- Squarespace automatically keeps draft versions, so you can roll back or compare past edits if needed.
Pro tip: Save your work frequently, especially after completing a major section, to avoid losing progress due to browser crashes or connection drops.

Troubleshooting: Fixing Common Editing Issues in Squarespace
Squarespace's visual, drag-and-drop interface is designed for ease of use—but even the most user-friendly editors can run into roadblocks. Below are four of the most common editing problems and step-by-step fixes to keep your workflow smooth.
1.Modules Can't Be Moved or Positioned Correctly
If you're using Fluid Engine in Squarespace 7.1, you should be able to place modules anywhere on the grid. If dragging feels "stuck" or restricted:
Possible causes:
- You're still on an older 7.0 template without Fluid Engine.
- A locked block is limiting placement.
- Modules are too close together, leaving no drop space.
- Your browser zoom is affecting the drag area.
Fix it:
- Upgrade the section to Fluid Engine via the section toolbar.
- Avoid editing inside heavily nested elements (like card containers).
- Adjust browser zoom to around 90% for more space.
- Refresh the page or try a different browser.
2.Font Changes Don't Show Up
Your font settings look fine in the editor, but on the live site, nothing changes, or certain sections still show default fonts.
Likely causes:
- You only updated a single block's font, not the global style.
- Custom CSS with
importantis overriding styles. - Old-style rules didn't sync.
- Fonts are blocked by network restrictions.
Fix it:
- Update fonts under Design > Site Styles > Fonts (Base and Heading).
- Check custom CSS for conflicting rules.
- Clear cache or preview in incognito mode.
- Verify font loading isn't blocked by your network.
3.Layout Looks Broken (Especially on Mobile)
Overlapping modules, text hidden behind images, or jumbled order on mobile can all signal layout issues.
Likely causes:
- Inconsistent spacing or alignment.
- Desktop and mobile layouts are not synced.
- Excessive overlapping of modules.
Fix it:
- Switch to mobile preview and check every section.
- Use Snap to Grid in Fluid Engine to restore spacing.
- Rebuild problematic sections instead of patching.
- Set min/max size limits to prevent overflow.
4.Edits Won't Save
You click Save or Done, but the changes disappear later.
Likely causes:
- Browser extensions blocking site scripts.
- Weak or unstable internet connection.
- Editing the same page in multiple tabs.
Fix it:
- Edit in incognito mode to bypass extensions.
- Ensure a stable internet connection.
- Only edit in one browser/tab at a time.
- Check Settings > Advanced > Site Availability isn't set to "Private."
Wegic: Your AI Website Team
If you've learned how to edit a Squarespace website, you might be asking yourself, "Is there a way to skip endless template tweaking, module rearranging, and style adjustments?" The answer is yes—and the solution is Wegic.
What is Wegic?
Wegic is an AI-powered website creation and management platform—trusted by creators, brands, and businesses as their all-in-one AI website team. It blends the skills of a designer, developer, and product manager into a single, conversational interface.
Simply tell Wegic what you want, and it will:
- Instantly generate a site structure tailored to your brand and goals.
- Auto-create page content, layouts, and intuitive navigation.
- Recommend & secure an available domain name.
- Show real-time previews of your site's visual design.
- Launch live instantly, and no server setup or DNS headaches.
- Continuously optimize your content and structure for better engagement and SEO.
Why choose Wegic?
- Zero coding. Even first-time website owners can create a professional site just by chatting with Wegic.
- Fully custom. Unlike rigid template tools, Wegic's AI adapts to your brand voice, industry style, and functional needs.
- Time-efficient. What used to take weeks now takes minutes, without sacrificing quality.
- Always improving. Wegic keeps your site evolving with AI-driven content updates and design refinements.
Click here to try Wegic👇

Concluison
Mastering how to edit a Squarespace website with the help of a structured Squarespace Tutorial is the essential first step for anyone looking to use a website to grow their brand, share content, or promote products. Thanks to Squarespace's visual, responsive, and no-code design capabilities, editing your site is no longer a technical hurdle. It's a creative process that anyone can enjoy.
From swapping out an image or refining a headline to completely reimagining your homepage, hands-on practice quickly equips you with the skills to customize any page. By learning Fluid Engine and perfecting style adjustments, every edit becomes a meaningful upgrade to your brand presence.
Once you've mastered the basics, you might be ready for the next leap—skipping setup entirely and letting AI handle your site from creation to continuous optimization. That's where Wegic comes in. If Squarespace is your precision design tool, Wegic is your intelligent business partner for building online assets. With a simple conversation, Wegic can:
- Create a fully customized, brand-ready site in minutes.
- Publish it instantly—no templates, no coding, no technical setup.
- Keep it alive with AI-driven updates and ongoing optimization.
The result? Your website evolves with your needs, shifting from a static page to a dynamic, responsive digital presence that works for you around the clock.
撰寫者
Kimmy
發布於
Aug 24, 2025
分享文章
閱讀更多
我們的最新博客
Wegic 助你瞬間打造網頁!
透過 Wegic,利用先進的 AI 將你的需求轉化為驚艷且實用的網站
使用Wegic免費試用,一鍵建立你的網站!